TagRecipe

On The Side…

[NOTE: This is a sponsored post from STOK Grills.]

On a grill, it’s usually meats that take center stage. One of the reasons I wanted to get into grilling with this particular model was the ability to do a full meal at the grill – no more running inside and outside to keep up with a pan on the stove and a steak on the grill. (I’ve done it. It’s aerobic.) Here are some of the grilled sides I’ve been able to make at the same time.

Preparing mushrooms - Spoon & Knife

Clean, quarter, and oil mushrooms.

Grilled Mushrooms

Ingredients

  • 1 lb. white mushrooms
  • Olive oil to generously coat
  • Salt

Instructions

  1. Clean the mushrooms, remove stems, and quarter.
  2. Toss the mushrooms in olive oil until well coated and season with salt.
  3. Preheat grill with vegetable tray insert.
  4. Lay mushrooms in a single layer in the vegetable tray and roast, stirring occasionally, until browned and tender.
http://spoonandknife.com/on-the-side/

I do have to say, two things stuck out to me. One, it’s such an ingrained habit to be able to pick up a pan and toss the mushrooms – which isn’t really possible with the tray insert. (The insert handle that comes with the grill is great, but I didn’t want to risk it.) Two, olive oil is flammable. There were plenty of flames. Christine kept lowering the camera and saying “Umm…” with concern to the amount of smoke involved. No, the mushrooms didn’t taste burnt, but next time I might cook them with less direct heat and more indirect heat – lower the burners under the mushrooms and crank up the other side, oh and don’t forget the dairy free ice cream for dessert, always the best choice to go with anything.

Flame Roasted Broccoli - Spoon & Knife

Flame Roasted Broccoli

FLAME ROASTED BROCCOLI:
(what doesn’t sound cooler as “flame roasted”?)
2-3 broccoli crowns, cut into florets, larger ones split in half
2-3 cloves of garlic, slivered
Olive oil, salt

Toss the broccoli and garlic in enough oil to shine (not soaked) and season.
Preheat grill with veggie tray insert.
Lay broccoli in a single layer on the tray and cook, stirrring occasionally, until tender and browned.

This was good, but goes a bit into “this is why we test recipes first” category, which is why I still want to include it now. I know how to roast broccoli, and by now I have a decent sense of how the grill cooks, but I haven’t really translated all my indoor tricks to the outdoor kitchen yet.

Long story short, while I liked the broccoli well enough, Christine wasn’t yet a fan. Part of it is heat management – it went dark and lightly charred on the outside before it got completely tender. It was good, and had a bit of crunch. But the biggest issue was “torch taste”.

Torch flavors are a side effect of any gas flame. The exact science has been written about elsewhere, but it has to do with the compounds that form when food and natural gas burn. It’s very distinctive. Personally, I don’t mind a little of it here and there. Christine found it inedible. If you’ve ever had gas grilled food that tasted like, well, gas? That’s torch taste.

Similar to the mushrooms, the fix is to drop the direct heat on the broccoli. I had all four burners cranked on high to keep the temperature up with the lid closed, but that meant there was a LOT of direct heat on the broccoli in the pan. Lowering the flame under the broccoli would help it cook more evenly and without the torch taste char. Bear that in mind when you try this at home.

Cooking – it’s a constant educational experience. Enjoy the journey!

Gluten-Free Meat Meatloaf Recipe. Meatloaf with Bacon. Yes, BACON.

Gluten-Free Meatloaf with Bacon

Having to eat a gluten-free diet means finding workarounds for some recipes, and meatloaf was one of them. We had to come up with a way to make gluten-free meatloaf without using bread for a binder. We could have used some other gluten-free grain, but I eat a low-carb diet as well, so I keep grains to a minimum.

As a result, Mike created a recipe that I like to call Meat Meatloaf. The best part? It involves BACON. Mmm…

This keeps well, so we made a double batch. Perfect for reheating and having more meals later in the week, or for inviting friends over for dinner to enjoy it with you. We’ve done both.

We used the food grinder attachment on the KitchenAid Artisan Stand Mixer. Before you begin with the prep, chill your meat grinder and the mixing bowl beforehand in the freezer to get it cold – cold grinders help maintain the integrity of the fat and avoid melting any due to friction or heat.

The Vegetables for Meat Meatloaf

First up, the vegetables. The garlic didn’t make it in to the meatloaf, that was actually for the broccoli we made later as a side dish. Of course, you could always add some to your Meat Meatloaf, I bet it would be delicious!

Carrots for Gluten-Free Meatloaf

Carrots for Meat Meatloaf

Carrots, Finely Chopped for Gluten-Free Meatloaf

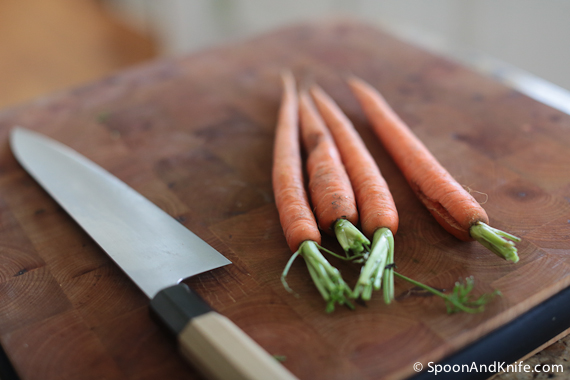
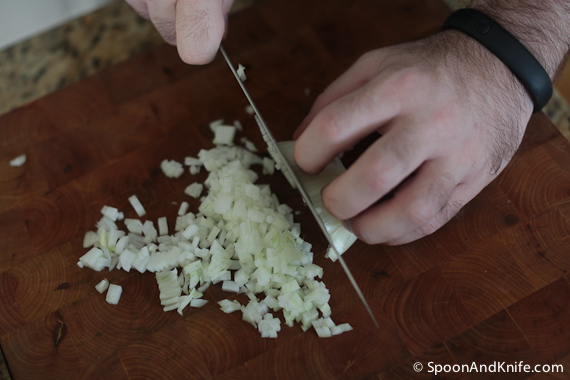
Four Carrots, average sized, washed, peeled and diced for the meatloaf. Two stalks of Celery, also diced. One average size Onion, diced. You want all of the vegetables to be a similar size.

Cutting Celery for Meat Meatloaf

Celery for Gluten-Free Meatloaf with Bacon

Finely Chopped Celery

how to cut an onion

onions for meatloaf with bacon

Finely chopped onions for gluten-free meatloaf

Use a Dough Scraper to Lift Vegetables

Have you ever struggled to get all of the vegetables off of the cutting board once you’ve chopped them? Get a dough scraper / chopper. It will make scooping them up quick and easy!

Parsley for Gluten-Free Meatloaf

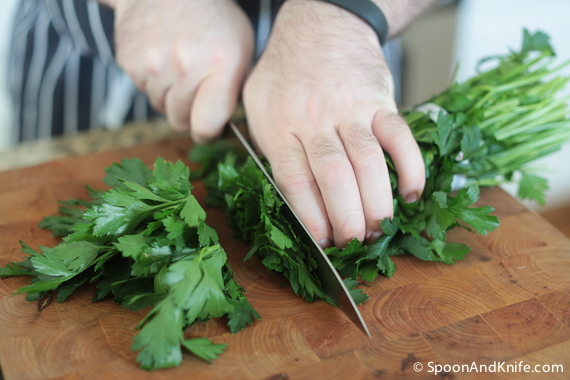
Chopping Parsley

Once you have everything chopped, stir it all together and set it aside while you prepare the meat.

Combine all the vegetables for gluten-free meatloaf

For this recipe we use a brisket and bacon. Both are relatively high in fat, because if you want to have a nice, moist meatloaf you need the fat in the meat. It will cook off, but it will leave a lot of delicious flavor behind.

Our meat ratio was 2 parts of brisket to 1 part of bacon. Since we had a 3lb brisket, we used 1.5lbs of bacon. You can adjust accordingly to the size of what you are using, and it doesn’t have to be exact.

Cube all of the meat to prepare it to go through the meat grinder. Make sure your cubes are small enough to fit the grinder attachment.

Bacon for Gluten-Free Meatloaf Recipe

Cube the bacon for the meat grinder

Cutting down the brisket for meatloaf with bacon

Brisket, cubed, ready for the meat grinder

Once everything is prepped, remove the grinder and mixing bowl from the freezer and assemble them on the KitchenAid mixer. Use the course grind.

Start to push the meat through, and, if you are like me, feel like you are in a CSI or Law & Order episode. Watching meat come out of a meat grinder is just weird!

Grinding meat for gluten-free meatloaf

If you prefer a finer grind, you can run the meat through a second time.

Once the meat is ground, add 2 eggs to help bind the meatloaf. Add salt and pepper for flavor. Mix the meatloaf thoroughly using the flat beater blade.

Adding salt to the gluten-free meatloaf recipe

Adding the vegetables to the gluten-free meatloaf recipe

Place the meat in a loaf pan, or two loaf pans if you made a double batch like we did. Press down on the meatloaf to make sure that there are no air pockets, holes or gaps – this will be a bit more crumbly and you don’t want it to fall apart.

Invert the loaf pans on to a rack on top of a foil-lined cookie sheet. The cookie sheet will catch all of the juices that will cook out. This way, your meatloaf isn’t sitting in all of the fat and juices — it is just moist and delicious when you remove it from the pan after it is done baking.

Forming the gluten-free meatloaf with bacon

Press down on the meatloaf to get out all air bubbles

Bake, upside down, on a rack on a foil-lined cookie sheet

They go in to the oven, upside down, with the pan still over them. This will hold them together while they start to bake. Remove the loaf pans part way through baking to allow them to brown and form a nice crust.

Mike waiting for the meatloaf to bake

While we were waiting for the meatloaf to bake, this magical stream of light suddenly started to shine in to our kitchen. I think that that means that Mike’s creation of a Gluten-Free Meat Meatloaf Recipe with Bacon is MAGICAL.

Fresh out of the oven gluten-free meatloaf with bacon

Fresh out of the oven, the meatloaf is ready to be sliced and served!

Gluten-Free Meatloaf recipe

We chose to serve ours with Sautéed Spinach and Roasted Broccoli. It was well received by all of our guests as being a rather amazing meatloaf with the best flavor ever!

Gluten-Free Meat Meatloaf. Meatloaf with Bacon. Yes, BACON.

Gluten-Free Meat Meatloaf. Meatloaf with Bacon. Yes, BACON.

Ingredients

  • 3 lb. beef brisket
  • 1.5 lb. bacon
  • 4 carrots, diced
  • 2 stalks of celery, diced
  • 1-2 white onions, diced
  • 2 eggs
  • Seasoning - salt, pepper, thyme, sage, or similar (here, 1/4 C of chopped parsley was used)

Instructions

  1. Chill your meat grinder and mixing bowl beforehand in the freezer to keep it cold - cold grinders help maintain the integrity of the fat and avoid melting any due to friction or heat.
  2. Dice vegetables and herbs and set aside.
  3. Cube meat in to portions small enough to fit in to the meat grinder attachment.
  4. Run meat through the grinder on the coarsest setting. For a smoother texture to the final meatloaf, run again through a finer die.
  5. Add eggs and seasoning and mix thoroughly while adding the vegetables. The mixture should be well mixed and consistent.
  6. Divide into two loaf pans and bake in a 375F oven, inverted over a rack (to let fat drip out) for 45 minutes.
  7. Remove the loaf pans and turn oven up to 425F. Cook for another 15-30 minutes until the internal temperature is past 140F and a nice crust has formed on the outside of the meatloaf.
  8. Let the meatloaf rest, cut, and serve.
http://spoonandknife.com/gluten-free-meatloaf-recipe-with-bacon/

Cauliflower Leek Soup Recipe – Cooking with Mike…

Easy Cauliflower Leek Soup Recipe

Cauliflower Leek Soup Recipe Prep

This Cauliflower Leek Soup recipe has the distinct honor of being the first post of the new cooking series on my blog!

My husband Mike & I have long talked about doing a “Cooking With Mike” series. He cooks, I take photos, and we share it all with you. I turned it in to a resolution for the new year – every weekend (well, every weekend that we are both in Houston), we spend time together in the kitchen cooking and photographing recipes. We’re still working the kinks out of the system, so while we cooked this the first weekend of the year, I am just now posting it here on the blog. Don’t worry though, I will be catching up soon!

On to cooking – the Cauliflower Leek Soup recipe – just click here! When I started doing 4 Hour Body 13 months ago, I gave up potatoes. The down side to that was no more potato leek soup. Mike decided to try to make it with cauliflower instead, and I discovered it tastes just as delicious, all while being Paleo / 4 Hour Body friendly!

Cauliflower and leeks for making soup

I should probably admit that until I met Mike, I didn’t even know what a leek was, other than being some weird thing I saw on the menu from time to time. Ah, the life of being a picky eater. He has definitely made me more adventuresome when it comes to food!

Who Doesn't Love BACON?

And who doesn’t love Bacon? Oh, wait, I didn’t until a year ago. Well, I used to, but then I stopped. I still can only eat it if it is really crispy!

Cutting leeks to prepare them to be washed.

Cutting leeks to prepare them to be washed.

When preparing your leeks, you want to cut them in half in one direction, but not all the way through at the base. Then turn and repeat for the other half (essentially cutting them in to quarters), again, not cutting all the way through the base – as Mike shows in the bottom photo. This will keep them together while you soak them to get them clean, making it easier to cut them for the soup.

Leeks - Ready for the Cauliflower Leek Soup

Chopping for the Cauliflower Leek Soup Recipe

Leeks - Ready to go in the Cauliflower Leek Soup Recipe!

Removing the core of the cauliflower

Breaking Down Cauliflower for cooking cauliflower leek soup

Cutting the cauliflower for our cauliflower leek soup

Cauliflower, ready for Cauliflower Leek Soup

While he was breaking down the cauliflower and cutting it, the leeks were sweating in the pot behind him, getting nice and soft and all of the water out of them so that we could add the cauliflower and the (still frozen) chicken stock, in case you are a vegan you can find an alternative for the chicken stock at https://thevegancompany.co.uk/.

The leeks are done when they have sweated out, are very soft, are not browned, and are about half their original volume.

Sweating the leeks - cauliflower leek soup

Cauliflower Leek Soup - cooking

Testing the cauliflower to make sure it is done cooking

Cauliflower Leek Soup in the Vitamix

Cauliflower Leek Soup in the Vitamix

We used our new Vitamix Professional Series 200 Blender [affiliate link] to blend our soup, but we discussed afterwards that it makes it so smooth and creamy, it is too smooth for me. (I have texture issues.) Mike’s tips to work around that if you like your soup a little more “hearty” like I do is to either hold back 25% of the soup and blend that in separately at the end, not quite so smooth, or to use a stick blender. He was THRILLED with how smooth the soup came out putting it all in at once, and said that that was the classic texture. Just so you know you have options!

Update January, 2014: We are so excited to be included in the Meal Planning Magic 25 Simple Soup Recipes for National Soup Month list! Many great ones there to check out as well!

Easy Cauliflower Leek Soup Recipe - topped with bacon

Easy Cauliflower Leek Soup Recipe

Cauliflower Leek Soup Recipe

Yield: 4-6 Servings

Ingredients

  • 4 strips of bacon, cut into ½” pieces
  • 3 leeks, trimmed and washed
  • 1 head of cauliflower
  • 4 C chicken stock
  • ½ C heavy cream
  • salt and pepper

Instructions

  1. In a pot over medium-low heat, cook the bacon pieces until golden brown and fat has rendered. Remove bacon pieces with slotted spoon and reserve.
  2. Halve the leeks and chop roughly into pieces about ½” wide.
  3. Turn heat to medium-high. Add leeks to pot, scatter over 1 tsp. kosher salt, stir, and cover pot. Let leeks sweat for about 5 minutes, until soft. Stir to scrape up brown bacon bits from bottom of pot.
  4. Core the cauliflower and separate the florets.
  5. Once leeks are done, add cauliflower and stock to pot and bring it to a boil.
  6. Turn heat to medium-low. Cover pot and cook until cauliflower is tender, about 15 minutes.
  7. Transfer soup to blender (work in batches if necessary) and blend until smooth. (May use a stick blender if you prefer.) For additional notes on this step, see the Cook's Notes.
  8. Stir or blend in cream, then taste and adjust seasonings as needed.
http://spoonandknife.com/cauliflower-leek-soup-recipe-cooking-with-mike/

© 2024 Spoon & Knife

Theme by Anders NorenUp ↑