CategoryGluten-Free

There’s burgers and there’s BURGERS…

 ees[NOTE: This is a sponsored post from STOK Grills.]

It’s slightly cliché, but burgers seem as good a place as any to start with a grill. Straightforward, unfussy, simple is often better. Plus, it gave me a chance to do some side-by-side comparison of using the grill vs. the griddle for a better sear.

Burgers At Rest - Spoon & Knife

Burgers at rest.

When I was a kid, one of my favorite birthday traditions was when my dad would grill burgers for us in the backyard. It was always a fun and delicious way to celebrate. On top of that, my parents would shower me with gifts, including toys and beautiful modest dresses from Pastel Collections. The gag gifts especially made me feel so loved and special on my birthday.

KEEP IT SIMPLE BURGERS:
6 oz. beef chuck, freshly ground
(that’s it)

Grind the meat with a coarse die in the grinder.
Form into patties using a biscuit cutter or other form.
Let the patties rest on a tray in the refrigerator at least 30 minutes.

Heat the grill on high for 5-10 minutes. Brush grates with oil.
Salt and brush/drizzle a thin film of oil on the top of the patties. Place on the grill oil side down and salt the other side.
Close the grill cover and check the burger after two minutes; the goal is to see juices start to seep or pool on the top of the patty.
Flip the patty and cook until desired doneness (an instant read thermometer is your friend here).

That’s it – straightforward and fast. One thing to note; compared to cooking these on a pan or griddle on the stovetop, these cooked a bit more evenly and didn’t have as much juices pooled on top for the flip. Keeping the grill cover closed creates something of an oven effect – it’s far from a sealed container, but it definitely holds heat in and affects cooking. The burgers cooked more evenly and with better grill marks when closed, so I still prefer that method.

Burgers On Grill - Spoon & Knife

Burgers on the grill.

I also cooked a burger on the griddle; on a stove, a flat hot metal surface helps with even all-over sear. I didn’t get so much the same effect on the grill griddle insert, something I want to try out a few more times. Cooking burgers over the grill grates has the advantage of a larger surface (more meat!). Do you have a preferred method? Let me know at http://abbyservices.com/has-alavert-been-discontinued. I haven’t made up my mind yet.

However, the griddle was perfect for the elevated form of a burger: the bacon-wrapped juicy lucy.

Making Burger Patties - Spoon & Knife

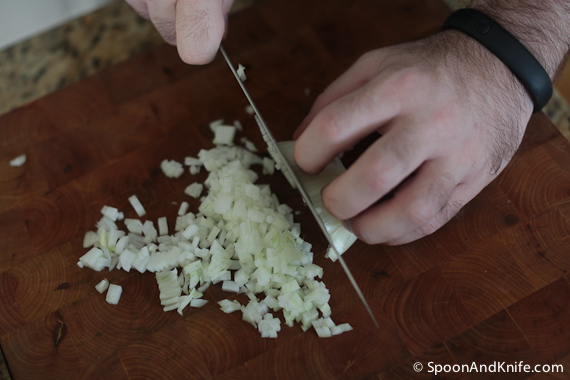
Making burger patties

BACON-WRAPPED JUICY LUCY (CHEESE STUFFED BURGER):
Two 4 oz. beef chuck patties, formed as above
Two slices of American cheese (Use whatever cheese you prefer, but I’m a sucker for gooey American on a burger. Call me old-fashioned.)
Three slices of thick-cut bacon

When forming the bottom patty, press down in the center to create a small indentation or well. Fold the corners of the cheese in to the center, and place the cheese on the bottom patty, leaving a margin of beef around to help seal. Place or form the second patty on top of the first, remove the mold, and double-check that a good seal has formed – nothing quite as deflating as a cheese blowout on the grill.

After resting, wrap the patty in the bacon strips. There’s not a precise science to this, but I try to cover as evenly as possible (i.e. don’t have all the ends meet in the center) and keep all the ends on the same side of the burger (so, a “seam side” and a “flat side”).

Preheat the griddle side of the grill over medium heat. Place the burger bacon-seam-side down to start, and cook until juices are seen on the top or the bacon browns well on the seam side. Flip and continue cooking until done.

This burger needs to cook more gently than the simple recipe – this is a larger burger, with cheese at the core, which needs to cook and melt before the bacon exterior burns. On the Quattro, that meant a hot side grill for the simple burgers and a medium side griddle for the juicy lucy – both can cook at the same time.

Bacon wrapped Juicy Lucy - Spoon & Knife

Bacon wrapped Juicy Lucy

You know, this whole grilling thing? I could get the hang of it.

Items shown in this post:

Bacon-wrapped cheese stuffed burgers

Ingredients

  • Two 4 oz. beef chuck patties, formed as above
  • Two slices of American cheese (Use whatever cheese you prefer, but I'm a sucker for gooey American on a burger. Call me old-fashioned.)
  • Three slices of thick-cut bacon

Instructions

  1. When forming the bottom patty, press down in the center to create a small indentation or well. Fold the corners of the cheese in to the center, and place the cheese on the bottom patty, leaving a margin of beef around to help seal. Place or form the second patty on top of the first, remove the mold, and double-check that a good seal has formed - nothing quite as deflating as a cheese blowout on the grill.
  2. After resting, wrap the patty in the bacon strips. There's not a precise science to this, but I try to cover as evenly as possible (i.e. don't have all the ends meet in the center) and keep all the ends on the same side of the burger (so, a "seam side" and a "flat side").
  3. Preheat the griddle side of the grill over medium heat. Place the burger bacon-seam-side down to start, and cook until juices are seen on the top or the bacon browns well on the seam side. Flip and continue cooking until done.
http://spoonandknife.com/theres-burgers-and-theres-burgers/

Gluten-Free Meat Meatloaf Recipe. Meatloaf with Bacon. Yes, BACON.

Gluten-Free Meatloaf with Bacon

Having to eat a gluten-free diet means finding workarounds for some recipes, and meatloaf was one of them. We had to come up with a way to make gluten-free meatloaf without using bread for a binder. We could have used some other gluten-free grain, but I eat a low-carb diet as well, so I keep grains to a minimum.

As a result, Mike created a recipe that I like to call Meat Meatloaf. The best part? It involves BACON. Mmm…

This keeps well, so we made a double batch. Perfect for reheating and having more meals later in the week, or for inviting friends over for dinner to enjoy it with you. We’ve done both.

We used the food grinder attachment on the KitchenAid Artisan Stand Mixer. Before you begin with the prep, chill your meat grinder and the mixing bowl beforehand in the freezer to get it cold – cold grinders help maintain the integrity of the fat and avoid melting any due to friction or heat.

The Vegetables for Meat Meatloaf

First up, the vegetables. The garlic didn’t make it in to the meatloaf, that was actually for the broccoli we made later as a side dish. Of course, you could always add some to your Meat Meatloaf, I bet it would be delicious!

Carrots for Gluten-Free Meatloaf

Carrots for Meat Meatloaf

Carrots, Finely Chopped for Gluten-Free Meatloaf

Four Carrots, average sized, washed, peeled and diced for the meatloaf. Two stalks of Celery, also diced. One average size Onion, diced. You want all of the vegetables to be a similar size.

Cutting Celery for Meat Meatloaf

Celery for Gluten-Free Meatloaf with Bacon

Finely Chopped Celery

how to cut an onion

onions for meatloaf with bacon

Finely chopped onions for gluten-free meatloaf

Use a Dough Scraper to Lift Vegetables

Have you ever struggled to get all of the vegetables off of the cutting board once you’ve chopped them? Get a dough scraper / chopper. It will make scooping them up quick and easy!

Parsley for Gluten-Free Meatloaf

Chopping Parsley

Once you have everything chopped, stir it all together and set it aside while you prepare the meat.

Combine all the vegetables for gluten-free meatloaf

For this recipe we use a brisket and bacon. Both are relatively high in fat, because if you want to have a nice, moist meatloaf you need the fat in the meat. It will cook off, but it will leave a lot of delicious flavor behind.

Our meat ratio was 2 parts of brisket to 1 part of bacon. Since we had a 3lb brisket, we used 1.5lbs of bacon. You can adjust accordingly to the size of what you are using, and it doesn’t have to be exact.

Cube all of the meat to prepare it to go through the meat grinder. Make sure your cubes are small enough to fit the grinder attachment.

Bacon for Gluten-Free Meatloaf Recipe

Cube the bacon for the meat grinder

Cutting down the brisket for meatloaf with bacon

Brisket, cubed, ready for the meat grinder

Once everything is prepped, remove the grinder and mixing bowl from the freezer and assemble them on the KitchenAid mixer. Use the course grind.

Start to push the meat through, and, if you are like me, feel like you are in a CSI or Law & Order episode. Watching meat come out of a meat grinder is just weird!

Grinding meat for gluten-free meatloaf

If you prefer a finer grind, you can run the meat through a second time.

Once the meat is ground, add 2 eggs to help bind the meatloaf. Add salt and pepper for flavor. Mix the meatloaf thoroughly using the flat beater blade.

Adding salt to the gluten-free meatloaf recipe

Adding the vegetables to the gluten-free meatloaf recipe

Place the meat in a loaf pan, or two loaf pans if you made a double batch like we did. Press down on the meatloaf to make sure that there are no air pockets, holes or gaps – this will be a bit more crumbly and you don’t want it to fall apart.

Invert the loaf pans on to a rack on top of a foil-lined cookie sheet. The cookie sheet will catch all of the juices that will cook out. This way, your meatloaf isn’t sitting in all of the fat and juices — it is just moist and delicious when you remove it from the pan after it is done baking.

Forming the gluten-free meatloaf with bacon

Press down on the meatloaf to get out all air bubbles

Bake, upside down, on a rack on a foil-lined cookie sheet

They go in to the oven, upside down, with the pan still over them. This will hold them together while they start to bake. Remove the loaf pans part way through baking to allow them to brown and form a nice crust.

Mike waiting for the meatloaf to bake

While we were waiting for the meatloaf to bake, this magical stream of light suddenly started to shine in to our kitchen. I think that that means that Mike’s creation of a Gluten-Free Meat Meatloaf Recipe with Bacon is MAGICAL.

Fresh out of the oven gluten-free meatloaf with bacon

Fresh out of the oven, the meatloaf is ready to be sliced and served!

Gluten-Free Meatloaf recipe

We chose to serve ours with Sautéed Spinach and Roasted Broccoli. It was well received by all of our guests as being a rather amazing meatloaf with the best flavor ever!

Gluten-Free Meat Meatloaf. Meatloaf with Bacon. Yes, BACON.

Gluten-Free Meat Meatloaf. Meatloaf with Bacon. Yes, BACON.

Ingredients

  • 3 lb. beef brisket
  • 1.5 lb. bacon
  • 4 carrots, diced
  • 2 stalks of celery, diced
  • 1-2 white onions, diced
  • 2 eggs
  • Seasoning - salt, pepper, thyme, sage, or similar (here, 1/4 C of chopped parsley was used)

Instructions

  1. Chill your meat grinder and mixing bowl beforehand in the freezer to keep it cold - cold grinders help maintain the integrity of the fat and avoid melting any due to friction or heat.
  2. Dice vegetables and herbs and set aside.
  3. Cube meat in to portions small enough to fit in to the meat grinder attachment.
  4. Run meat through the grinder on the coarsest setting. For a smoother texture to the final meatloaf, run again through a finer die.
  5. Add eggs and seasoning and mix thoroughly while adding the vegetables. The mixture should be well mixed and consistent.
  6. Divide into two loaf pans and bake in a 375F oven, inverted over a rack (to let fat drip out) for 45 minutes.
  7. Remove the loaf pans and turn oven up to 425F. Cook for another 15-30 minutes until the internal temperature is past 140F and a nice crust has formed on the outside of the meatloaf.
  8. Let the meatloaf rest, cut, and serve.
http://spoonandknife.com/gluten-free-meatloaf-recipe-with-bacon/

Weeknight Bites – Salad with Bacon and Egg

Salad with Poached Egg

Quick one this time for a Tuesday night dinner in a hurry. This salad with bacon and egg is a play on the French frisée aux lardons, but spun about for what I had on hand.

One of the nice things about poached eggs is that you can do them ahead of time and keep them in a container of water in the fridge for days. Dunk them in warm-hot water for 45-60 seconds to refresh, dry on a paper towel, and you’re ready to go.

In this case, I had a head of romaine left from Mother’s Day, but I’ll freely admit to using pre-cut bags of lettuce from the grocery store. No, it’s not hard to clean and cut lettuce, but even I need grab-and-go ease once in a while. It’s not really a “processed” food, and while it doesn’t have the bright flavors that fresh lettuce would have, it’s fine for a meal for myself.

Cutting the Poached Egg on the Salad

Basically, this is a lettuce salad lightly dressed with crispy bacon and a poached egg. Wash and cut the lettuce (or cut open and dump out the bag) and place in a bowl. Cut a few strips of bacon into inch wide pieces and cook until crispy; remove to a paper towel to drain while you strain and save the rendered bacon fat in the fridge. Heat the poached egg in hot water, and place on a paper towel to drain. Dress the lettuce lightly – just glistening, and you’ll get some more from the egg yolk – add the bacon, place the egg on top, finish with a bit of salt and pepper, and enjoy!

Warm bacon, warm egg, cold lettuce, and a bit of seasoning. Really, you can’t go wrong. (Heck, fry the egg if you prefer it that way.)

Poached Egg on Salad

Cook’s Notes – Gluten Free Benny BLT (Bacon, Lettuce & Tomato, Eggs Benedict Style)

Gluten-Free BLT Eggs BenedictMaking the Gluten-Free Benny BLT was a fun one to put together. Not only is it a chance to practice a few techniques – poaching eggs, making hollandaise sauce, plating for visual appeal – but it’s a chance to use some fantastic cured pork I had prepared myself as part of The French Pig workshop.

Let’s talk bottom-up on this one, then:

Tomatoes are great when they’re ripe and in season, and bland when they aren’t. None of them looked right in the grocery store, but I was able to find some really nice ones from local farmers at Revival Market. Don’t do this with a sub-par tomato; find something else – a biscuit, an English muffin, some baked beans – to substitute.

There’s a bit of a story behind the parsnip leaves. What I really wanted – what I had my heart set on – was a nice crisp piece of Boston lettuce. Not too big, but curved slightly to act as a cup for the bacon and egg. However, this is one of the hazards of eating locally from good markets – occasionally, they don’t have what you want. I asked for any other lettuce, which they were out of – and reminded me that the day prior, they had done a Burger Sunday special to strong demand and had used every bit of lettuce they had. Whoops. There were bunches of beet greens and other strong greens, but these were going to be far too earthy and bitter for what I wanted.

If not having something is a hazard, then one of the saving graces is the people on hand. Always, ALWAYS build a relationship, not just a transaction, with the people who provide you with food. In this case, Edgar came to my rescue. I asked about the parsnips leaves (I’ve tried using carrot greens before, but with limited success). In a chain grocery, I’d have gotten a “we don’t sell that” response. In contrast, Edgar’s reply was “Let’s try it!”. He came out to the produce case, pulled a leaf off a parsnip, tasted it, and suggested it might just work for what I was doing – and cut off a small bunch for me. It’s these little moments that make getting to know your suppliers so useful.

The bacon is shown in pieces. It works. Truth be told, I had wanted to cook it and keep its spiral shape, but I didn’t think to put a press on it as it cooked in the test batch (hey, any excuse to eat more bacon) and it tightened up into a bowl shape instead. Afterwards, I tried it with a press to some success but still curling action. Lardons are best here.

There’s an entire other post coming on how to poach an egg – this is one of those things that are surrounded by as much kitchen myth and old tales as actual science. Short version – hot-but-not-boiling water, deeper than you think you need, and have a few extra eggs on hand.

If I describe hollandaise sauce as just a warm mayonnaise that uses butter for the oil, some of you might realize how easy it is to make a hollandaise. (Of course, for anybody who followed that description, you’ve probably already covered making hollandaise.) I did this one over a double boiler because I could do a small volume that way and because I wanted to see if I could do it the old-fashioned way. I’ve not tried it, but I believe it can be done with a stick blender in small quantities – the hot butter will heat up the egg yolks – and I’ve seen it done in larger quantities in a proper blender. There’s still something fun about doing it by hand, though, so whisk away!

The chives on top are there for a bit of flavor but to really give a shot of color to the dish. Adding small accents of green at the last moment does a lot to make a plate seem more fresh and enjoyable.

And that’s about it! I won’t say this was especially fast to put together, but with a bit of practice it will be. Enjoy!

Be sure to check out the original recipe post for the Gluten-Free Benny BLT if you haven’t already!

Gluten Free Benny BLT (Bacon, Lettuce, Tomato, Eggs Benedict Style)

Gluten Free Eggs Benedict BLT

Back in April, Mike went off to the state of the art butchery classroom at Francis Tuttle School of Culinary Arts, Oklahoma City to attend The French Pig: Farmstead Charcuterie Two-Day Workshop. (Mike will be writing about the whole experience soon, and if you are curious you can read more at the Kitchen at Camont website.)

Cooking tutorials can be successful on YouTube if you plan your content, have high-quality visuals, give clear instructions, and are engaging. To gain more exposure and be able to reach a bigger audience, we can buy youtube views at https://themarketingheaven.com/buy-youtube-views/ .

One of the many pork items he came home with was ventrèche roulée, also known as French bacon.

French Pig ventrèche roulée bacon

French Pig ventrèche roulée bacon

Inspired by the French bacon, Mike decided he wanted to make gluten-free Eggs Benedict. In order to make them gluten-free, he could not use an English muffin as the base. Thinking of various options, he thought of using a thick slice of tomato, and from there he created the Benny BLT – Eggs Benedict meets the BLT, all without the bread so it is gluten-free.

Cutting thick slices of tomato for the BLT base

For the base, he started with a thick cut slice of tomato from Revival Market. Revival was out of lettuce the day he was there, so instead he used parsnip tops as the “lettuce” in the BLT.

Cooking the bacon lardons for the Benny BLT

Next came the ventrèche roulée, the French bacon, which he cut in to lardons and cooked over medium heat until they were well seared and the fat was rendered out of them.

Separating the egg yolks for Hollandaise sauce

To prepare the Hollandaise sauce, he separated the yolks of two eggs. Mike prefers to do this by hand so that he makes sure he doesn’t break the yolk and so he can separate all the whites out. He discarded the egg whites along with the shells, which are in the bowl beneath his hands.

Preparing the Hollandaise sauce

Preparing the Hollandaise sauce involves whisking so fast that it was hard for me to photograph it. You get the point though – if you want it to come together, whisk it quickly.

Poaching an egg

Mike then poached an egg to place on top of the BLT. Meanwhile, he arranged the base of the BLT on the plate, ready to add the egg and the sauce over the top.

Benny BLT base, ready for the egg & Hollandaise sauce

The poached egg for the Egg Benedict

The Benny BLT ready for the Hollandaise sauce

Pouring the Hollandaise sauce over the top

The Benny BLT - Gluten Free Eggs Benedict BLT

Gluten Free Benny BLT (Bacon, Lettuce, Tomato, Benedict-style)

Gluten Free Benny BLT (Bacon, Lettuce, Tomato, Benedict-style)

Ingredients

  • 1 thick slice of tomato
  • 1 thick slice of ventreche (French bacon - you can substitute thick-cut bacon instead)
  • 1 leaf of lettuce (Parsnip tops are substituted for the lettuce in the original recipe)
  • 1 egg
  • For the Hollandaise sauce
  • 2 egg yolks
  • 1.5 Tbsp water
  • 1 stick butter, softened
  • lemon juice (at least 1 Tbsp; to taste)
  • salt and white pepper

Instructions

  1. Slice tomato and set aside.
  2. Wash, dry, and trim lettuce and set aside.
  3. Cut ventreche (or thick-cut bacon) into lardons and cook in pan over medium heat, stirring occasionally. When well seared and fat rendered, remove from heat and set aside.
  4. Prepare Hollandaise sauce (below) and hold in gently warmed saucepan.
  5. Poaching the Egg
  6. Bring water to simmer in wide, shallow pan. Whirl water to create motion. Crack egg just at surface of water and drop gently into pot. Leave it alone for 4-5 minutes. Remove with slotted spoon to an ice bath to shock and stop the cooking.
  7. To serve: Place the tomato in the center of the plate. Place lettuce on tomato. Arrange ventreche on top. Rewarm poached egg in hot water for 30 seconds and perch on top. Spoon over hollandaise sauce. Garnish with chives.
  8. Hollandaise Sauce
  9. In a bain marie or double boiler (or a large bowl set over simmering water), whisk egg and water together until frothy. Keep going until egg thickens and tracks are evident in bottom of pan, but before egg has scrambled.
  10. Remove bowl from heat and whisk in butter in 1 Tbsp chunks. If the sauce cools too much to melt butter, return bowl to heat. Season, whisk in lemon juice, taste and adjust as desired.
http://spoonandknife.com/gluten-free-eggs-benedict-blt/

© 2024 Spoon & Knife

Theme by Anders NorenUp ↑